Pages

Thursday, April 5, 2012

A Ceramics Lover's Alternative

In my last post, I mentioned that I hadn't made a model of one of my dogs, so I finally got it finished a couple weeks ago. Isn't he cute? 
His name is Connor, and while was working on the model, the real guy was checking out my progress.
 I know everyone has their strengths, but I really do think working with polymer clay is much easier than most people think. I am going to show you step by step how I made the little cutie.

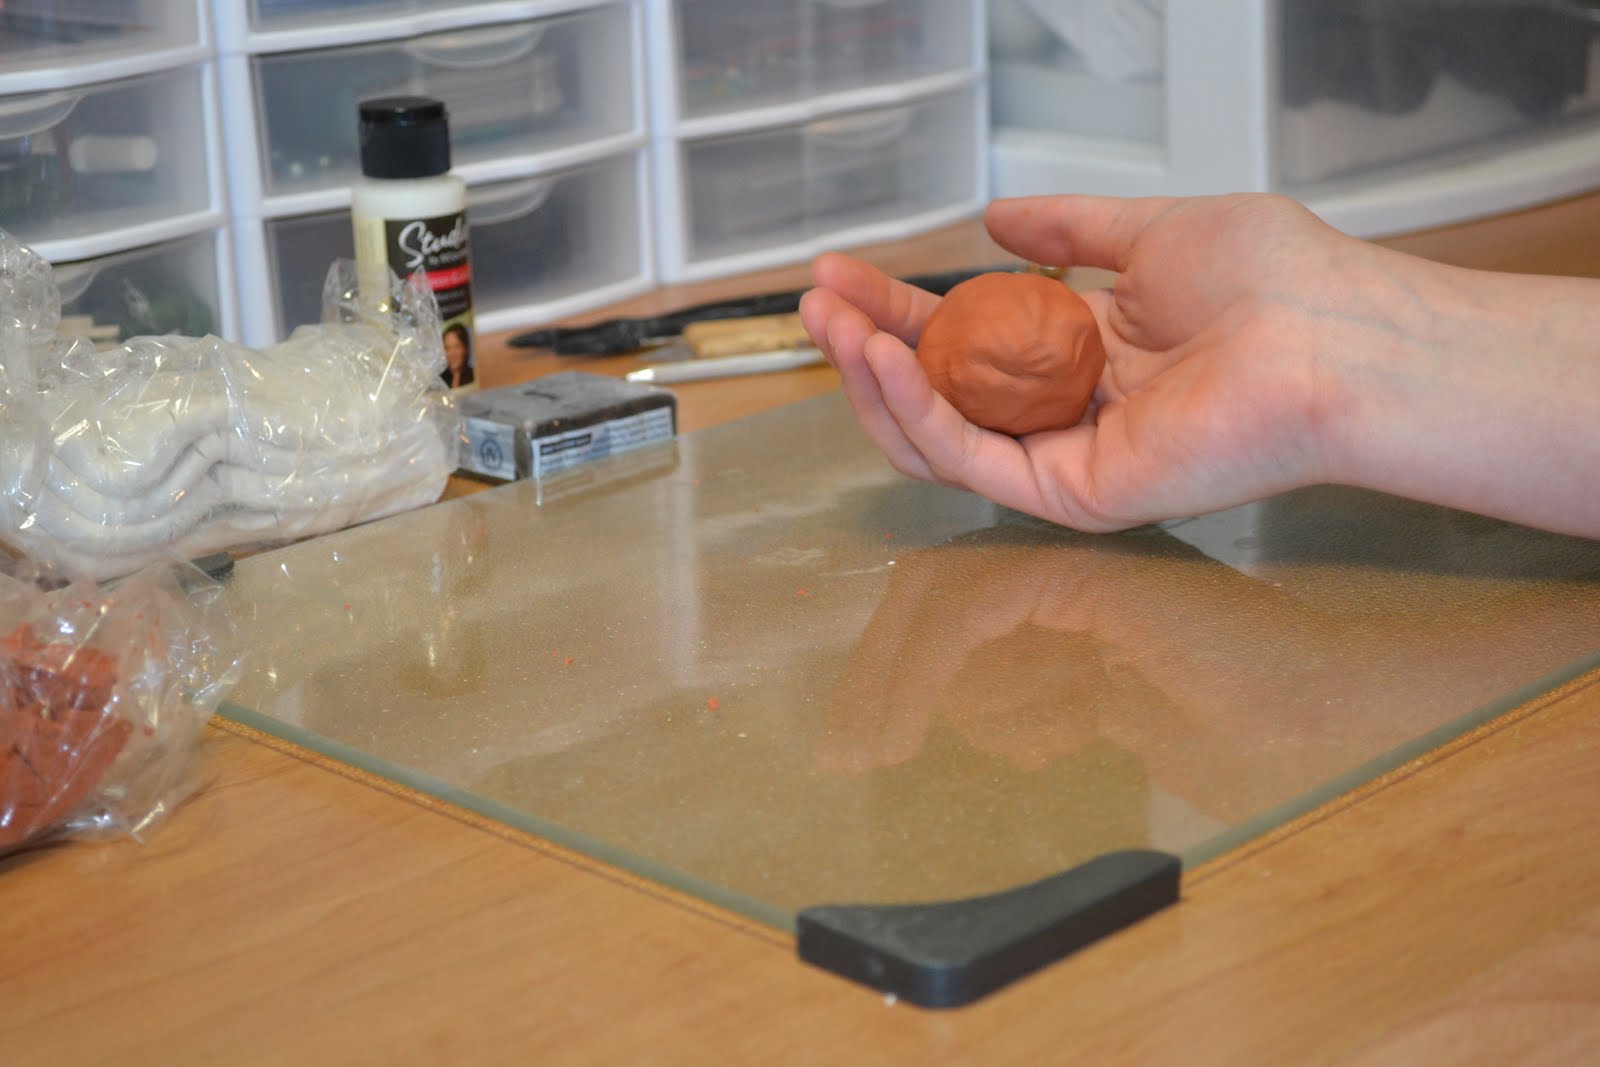
First step, of course, is to collect everything you will need and get it set up. The clay will stick to your hands, especially since once it gets warm from being worked, so you don't want to track it all over the house looking for something you forgot. Once you have your supplies, start kneading an working the clay in your hands to soften it. Work with lighter colors first if you do not want to mix colors. Darker colors, like the Terracotta I used here, will stick to your hands and mix with whatever your lighter colors. I didn't mind the slight mixing because his white is not very pure.


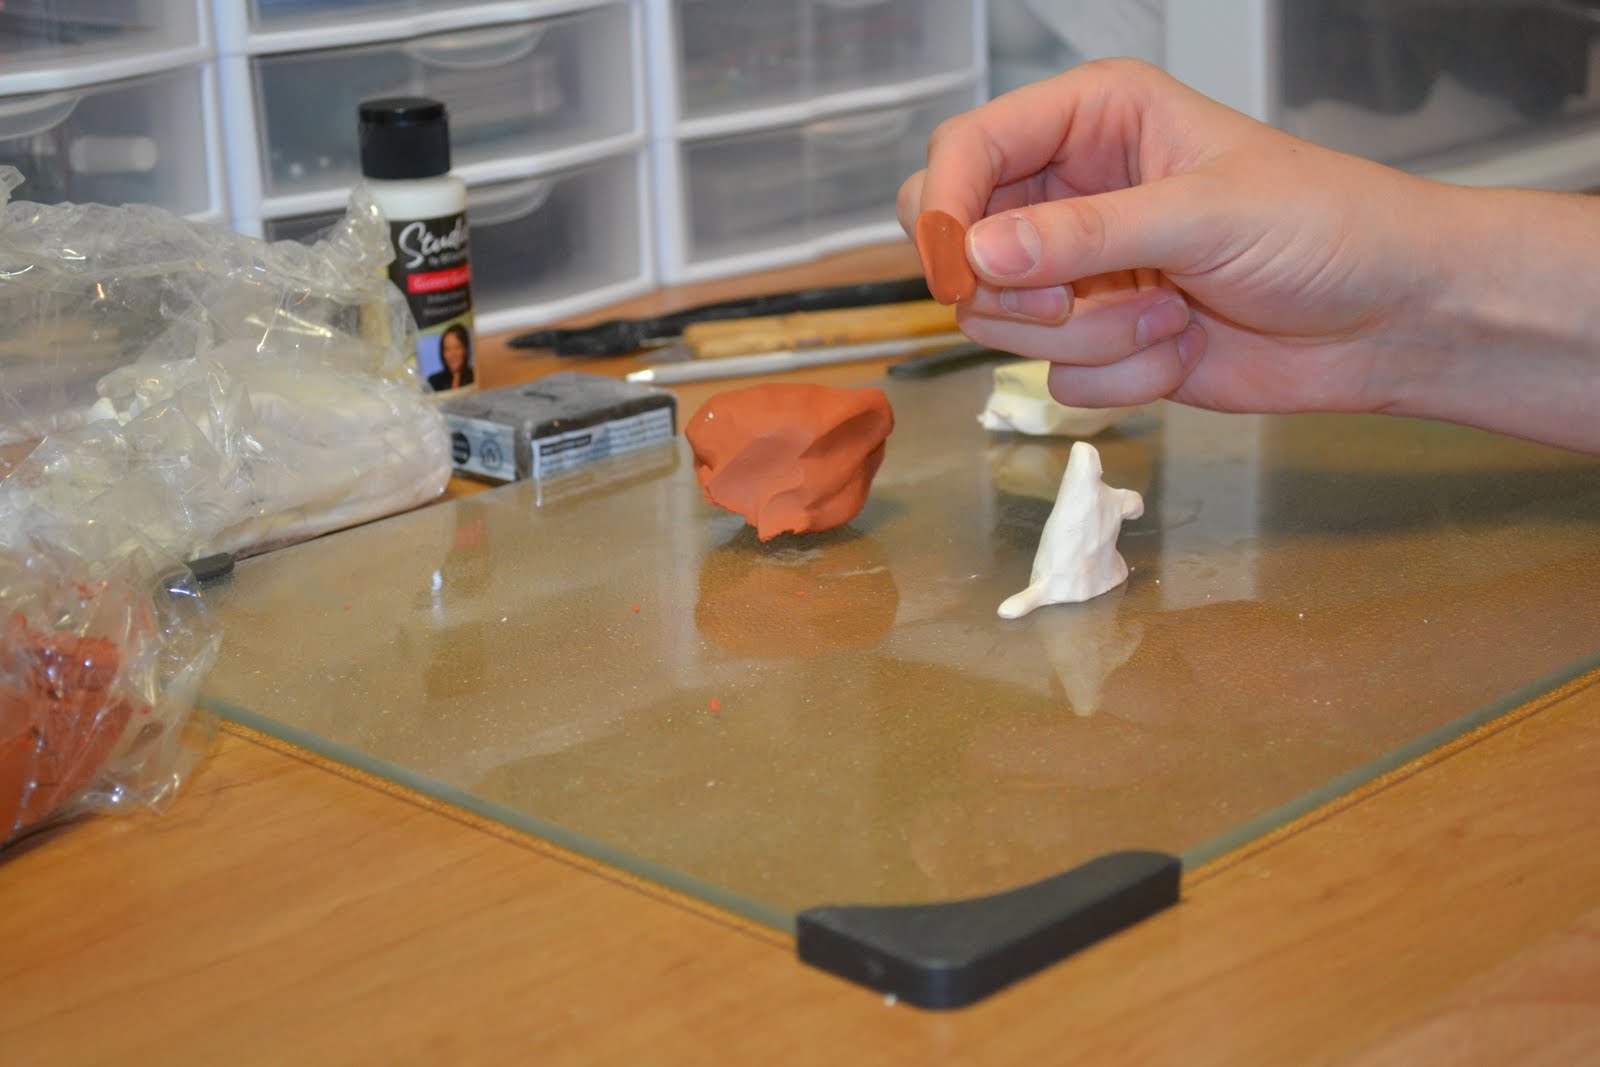
Once your clay is ready, start to form the base shape with the most common color, or a color you don't mind covering up. I used the white because his belly, chest and legs are white and it lessened the amount of work that would be needed to color his tiny belly.

 Next, I layered some of the Terracotta over the white to start adding in his red fur. I made the layer thin so that when I add the detail I could scratch through some of the white.


 Time to add his head. You can see that I left a nub of white in the last part, so that becomes his chin, and a ball of Terracotta becomes the top of his head.

 Since I had the base shape complete, I stretched down his legs so that the model is in a sitting position, and then set him on the tray I used to bake the clay so that I wouldn't need to move him much until after cooking. The legs are very soft because of how tiny they are so I wanted to move them as little as possible. Once he was on the tray, I used some of my tools ( I got used to them in ceramics class in high school, but you don't need them) to shape the legs and the rest of the base.


Connor has a bit of a beard under his chin, so I added an extra piece of white so that I could show how puffy he gets.


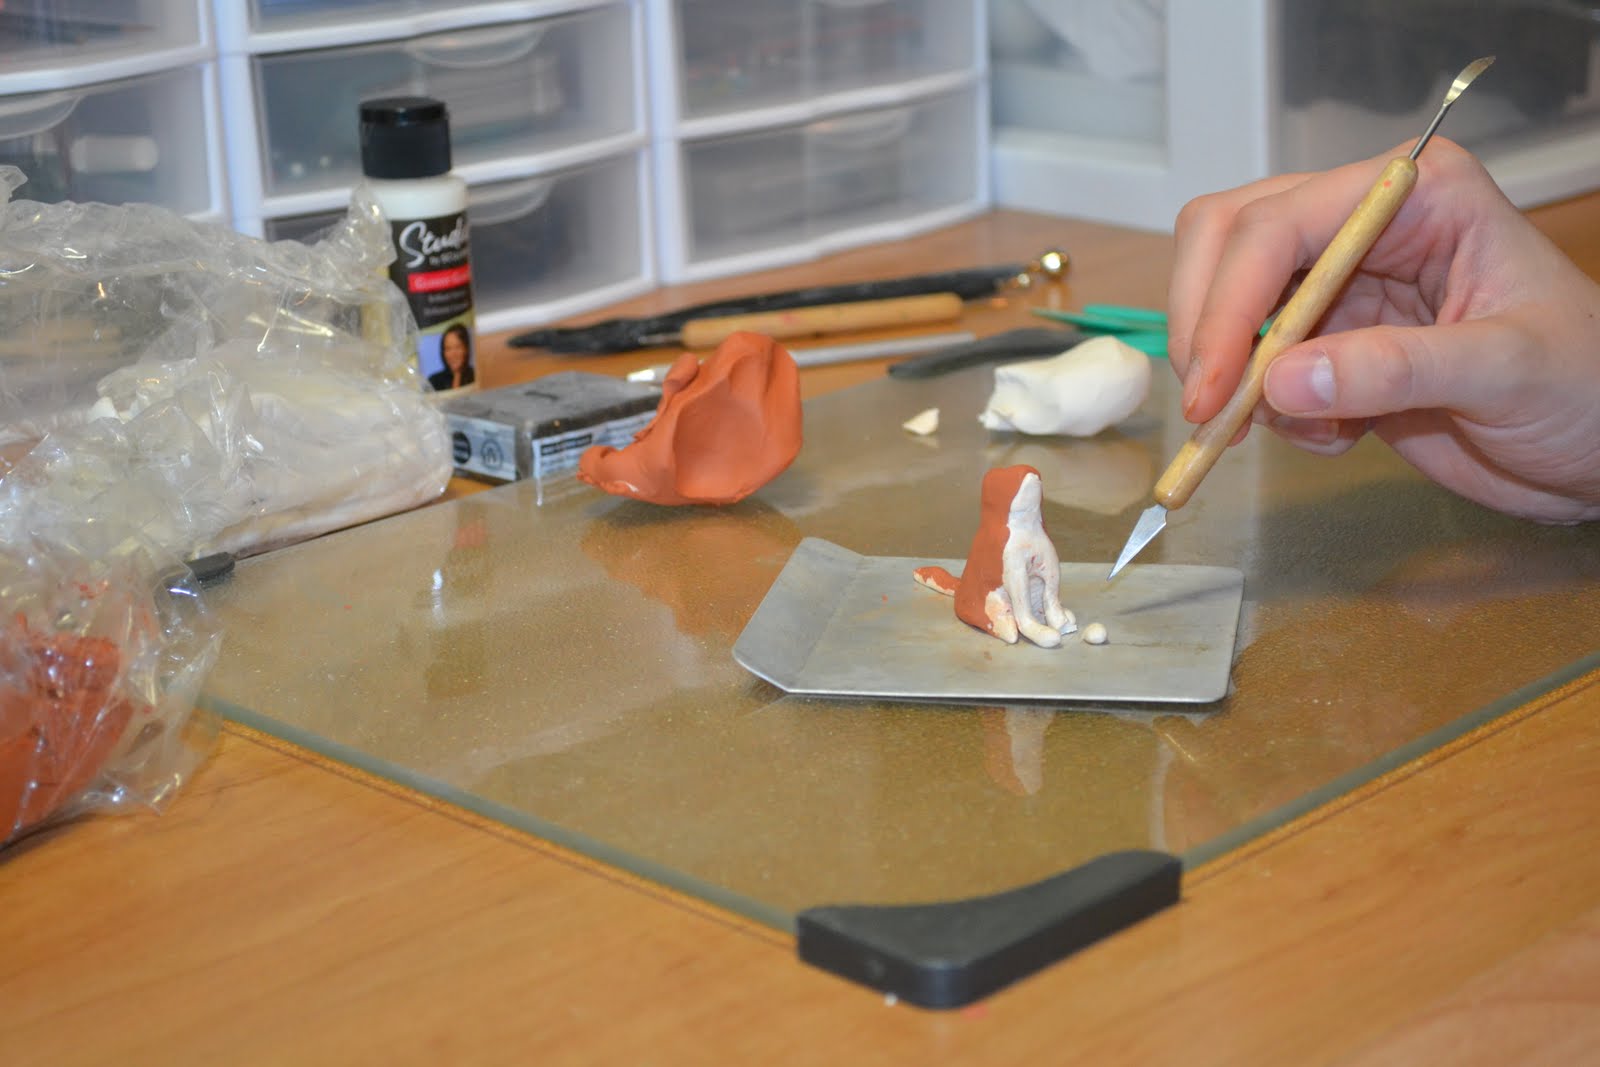
Ears are next. To create them, I pinched and molded the clay on the top of the head until they were little triangles, with the bases slightly curved.


 Next, I put indents where his eyes are and started blending some of the Terracotta and white together.


 With that done, it was time to start the detail work. He has a Pomeranian tail, so i started there. I curved it, and then started scratching the clay to give the impression of fur.


After that, I worked from the bottom up, scratching "fur" into the clay.


 Next, I added the eyes and nose by placing small balls of black clay into the indents I created before the fur, then did the detail work around the eyes and nose.


Once all the fur and eyes were done, I flipped the tail up and created the fur on the bottom of the tail.


Here is the finished product before baking.


Because he is so thick, I baked him at 275 degrees for 30 mins. The clay I used recommends 15 minutes for each 1/4 in thickness. After he was finished, I brushed the extra pieces off of the model and placed him on the shelf next to the model of our other dog, Buddy. ( and with the grumpy old fisherman I made for my husband).

Saturday, March 31, 2012

Terrariums!

Seems like everyone is selling or making terrariums anymore, so why not me too? I have looked at them a few times but never bought one. Knowing that, and that I think cut flowers are a waste of money, my husband got me a terrarium for Valentine's Day this year, instead of my normal potted plant. He picked it up at Rhoad's Garden in Montgomeryville, PA. 


After that, I was hooked. Two weeks later, I attended an hour long class at the same greenhouse and came home with another terrarium, same shape, different plants. 

If you live in the area and are interested in plant or plant related decor, check out the rest of their classes! I am holding off for now, but at some point I want to attend the bonsai course.

That wasn't enough though. I convinced my dad to part with a couple of old jars he had and bought some Phalaenopsis Orchids, a maidenhair fern, a frosty fern, and 2 small, so far unidentified plants (my biggest gripe with ALL greenhouses in this area is their lack of plant identification). 


These are the plants I have in my window. The 2 foliage plants in the middle were my mom's. the one in the back she had at her office, and the one in the front was a gift while she was sick. The candle toppers on each side were also hers. The little stone bird was a gift from my husband for our 2nd anniversary last year. 

Today, I had the itch again and went out while the hubby was fishing. This one I managed to document for you.
You need to have some horticulture charcoal for the bottom of the terrarium. This will help filter any water that gets down there and keep it from smelling. Since this one was only going to have a single orchid, I found a mini Phalaenopsis at Ott's greenhouse in Schwenksville, then drove over to Michael's to find a container. I stumbled on some jade pieces while I was there and got them as well.

I laid out everything I needed. I mixed Orchid bark mix and Orchid moss, mostly for the look it would create in the brandy style container I picked, but I am also hoping that the moss will hold water well and the moss and bark will provide a good mix of nutrients. The container in front has my charcoal, and there are 3 bags of different sized rocks. Make sure you wear gloves.

 Wash your container, to remove any dust or anything else that may be harmful to your plants. Your best bet is to use only water to prevent any contamination.

Next, pour the charcoal into the bottom of the container, to create a thin layer.

Next I added some of the bark. I also set some of the larger stones around the edge.

After soaking the moss in water to re-hydrate it, I added a good layer of it on top of the bark.

Now, time to add the orchid. After removing it from the pot it came in, I slightly separated the roots before placing it into the middle of the container. 

 To hold down the moss, and for a finished look, I set a few of the larger river stones around the top. Next I sprinkled a few of the small pebbles around the top. 

 I still wasn't happy with the look, so I filled in the space between the stones and pebbles with the pieces of jade I got. I really like the effect it created.


Finished and in it's place of honor. Its actually right next to the rest of the plants in the window. I may need to move some of the others once the summer is in full swing, because most of them do not like direct light. For now, they seem to be doing good though.